

PfSense stands out as an open-source firewall based on FreeBSD, earning its reputation as my top choice for live deployment in medium to small-scale enterprises or home setups. Its effectiveness and versatility make it preferable in specific use cases over pricier OEM solutions.
Even though it is open-source nature, PfSense doesn’t compromise on essential firewall features. Being open source allows users to enhance its functionality with various third-party software packages.
PfSense comes in two editions: Community Edition (CE) and Plus. PFsense CE is open source, and it is freely available for download and deployment on physical or virtual machines. The Plus edition isn’t open source, and it comes preinstalled on NetGate devices and cloud platforms. Today, I aim to guide you through the process of installing PfSense on the Oracle Virtual environment
Installation Requirements
- Windows, x OS, or Linux with Oracle VirtualBox Installed
- PFSense ISO image
- A capable computer system with enough hardware resources and virtualization enabled.
- Basic Networking and computing knowledge.
Initial VirtualBox Set-Up
You need to download PfSense from the official website. Then, on the download page select AMD64 as the architecture then select DVD Image ISO installer whichever mirror is closer to you, and download.
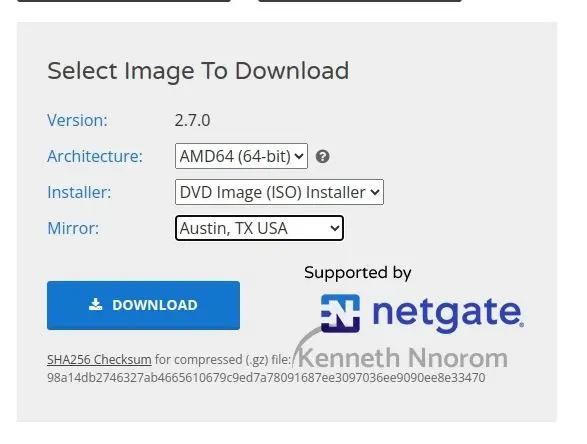
The downloaded ISO file will be in GZip format and needs to be unzipped. If you’re using Windows OS, you can utilize 7Zip for unzipping. Linux users can use the terminal with the command ‘gzip -d’ for the same purpose.
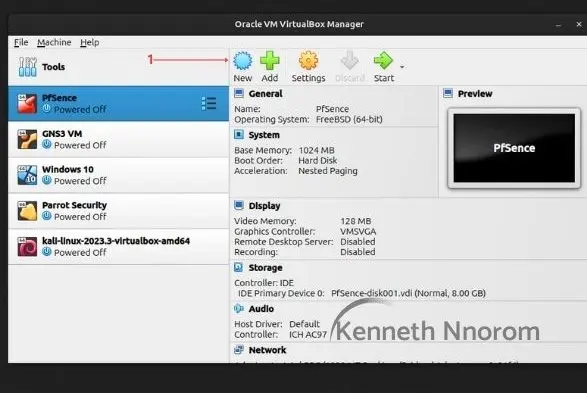
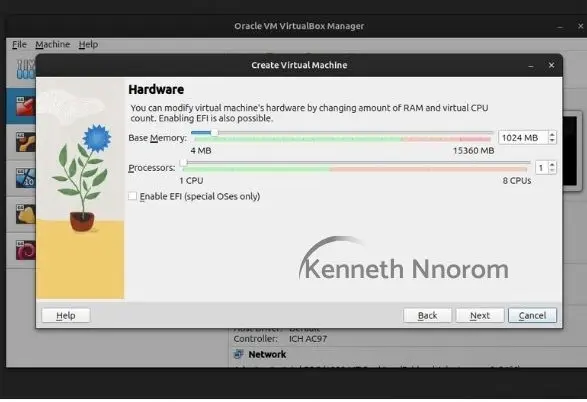
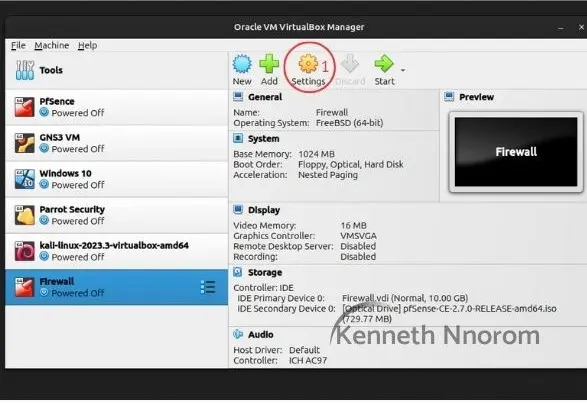
Once unzipped, launch Oracle VirtualBox for the installation. Click on ‘New,’ and a dialogue box named ‘Create Virtual Machine’ will appear. Here, provide a name for your virtual machine and import the ISO image. For this tutorial, I named the virtual machine ‘Firewall’ to avoid conflicts with my existing PFsense installation. This separate setup ensures the tutorial process does not impact my previous configuration.

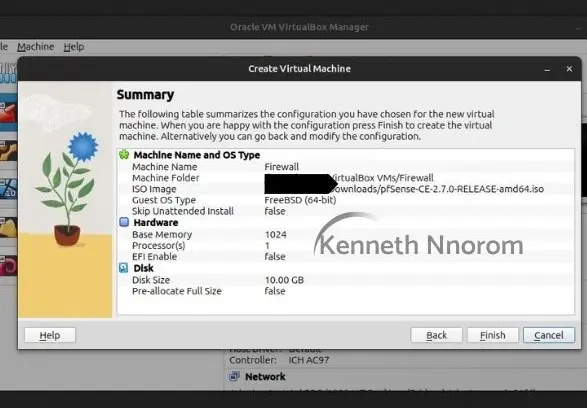
Thereafter, define your storage requirements, for tutorial purposes 10GB is enough but in a typical installation, more storage will be needed. Afterward, click on next, review your setup, and finish.
Network Cards Set-Up
Before proceeding with the installation, configure two network cards for the firewall. Typically, firewalls/routers require a WAN port for outgoing traffic and a LAN port for internal traffic. This principle also holds for virtualized firewalls, so let’s set that up.
Since this is a virtual environment for demonstration, we would set up the first network adapter for the virtual machine as “NAT”, this card would serve as the WAN link. Thereafter, we would set up the second adapter for LAN as a “Host-only adapter“.
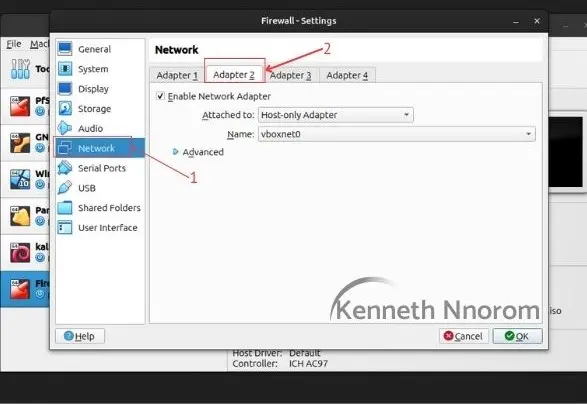
From the settings menu on the newly created firewall, select network.
Before proceeding to select Adapter 2, as shown in the image below, make sure you first configure Adapter 1 as NAT. Then, enable Adapter 2 and change the ‘attached to’ option to Host-Only adapter, selecting your preferred host-only adapter.
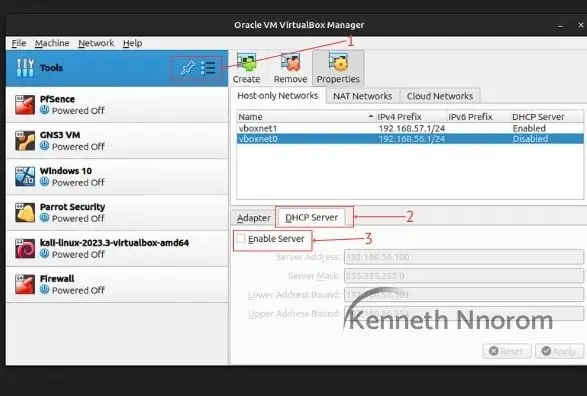
I would also recommend disabling the default DHCP services for the VirtualBox Host-Only adapter. I prefer to use the PFsense DHCP service for provisioning DHCP. To do this, navigate to ‘Tools,’ click on the unordered list icon (if I may call it that), then select ‘Network.’ Follow the steps in the image to disable the DHCP server. Make sure to take note of the IPv4 address for the Host-Only network, as we might need to reference it later in the lecture. In my case, it’s 192.168.56.1
One more crucial note: On Oracle VirtualBox, it’s often recommended to switch the adapter type for PFsense to “Paravirtualized Network (virtio-net)”.
A quick note: In addition to using the Host-Only Adapter for LAN, you can also utilize the Internal Network adapter. This setup allows you to create an isolated virtual network for the VMs connected to the firewall’s LAN. Personally, I prefer and continue to use the Host-Only Adapter to facilitate connections from other VMs outside of VirtualBox to the firewall’s LAN Network. For further insights into the various VirtualBox network adapters I’ve mentioned so far, you can explore more details here
The Installation
With the network setup complete, the next step is to start the PFsense virtual machine for installation. I’ll present the following steps in an unordered list format as most setups are essentially defaults. Corresponding images for each step are available in the gallery right below the list.
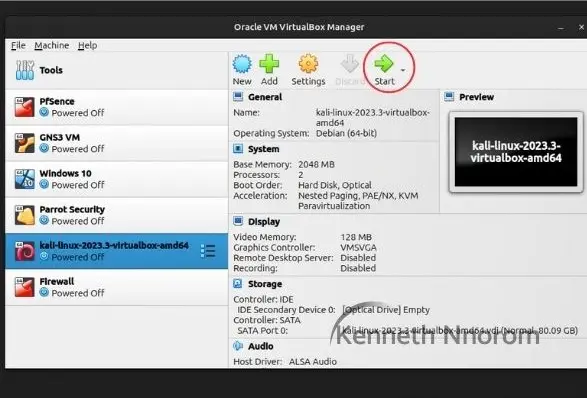
- Start the Virtual Machine
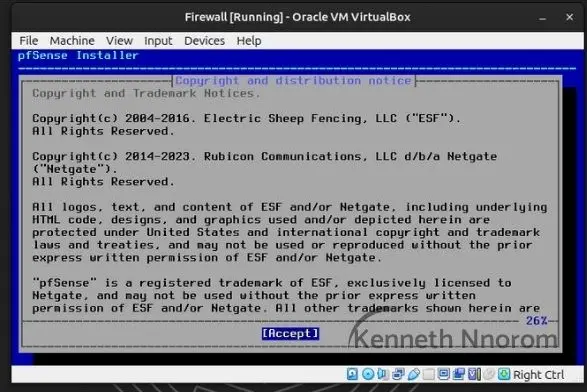
- Accept the terms and conditions
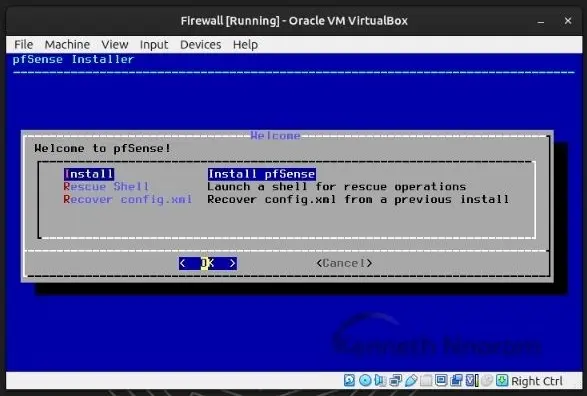
- Select the Install pfSense and OK
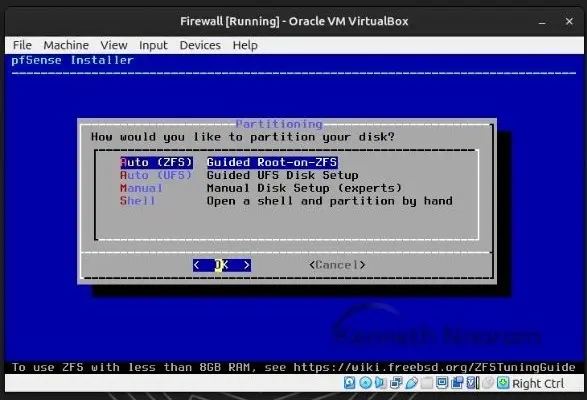
- Select Auto ZFS partition, it is the default and should be your default for now.
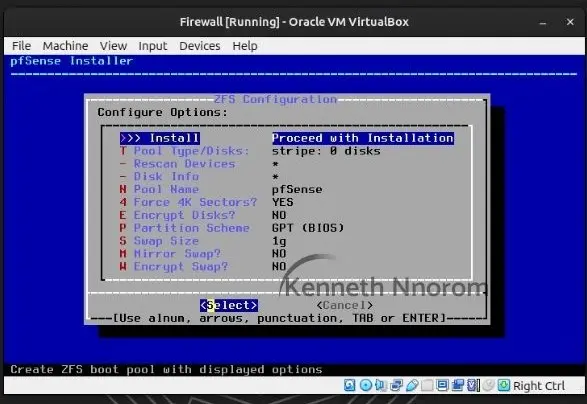
- Proceed with the installation in the next step and leave most of the other disk configuration options at default for this installation
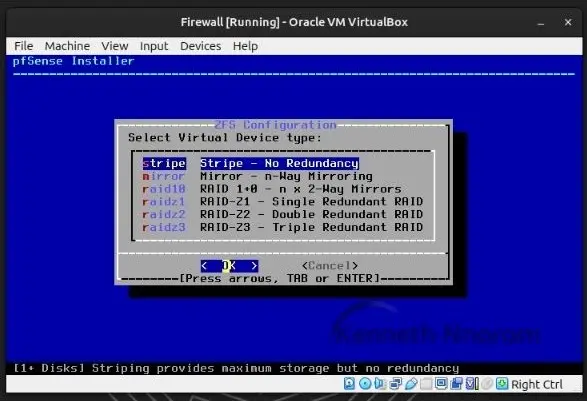
- Select Stripe for this installation.
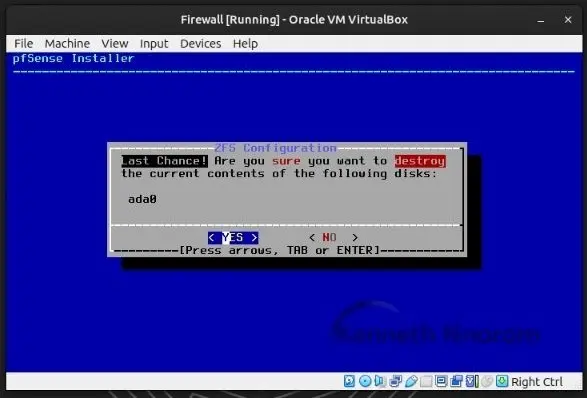
- Confirm by selecting “Yes” to proceed to destroy the contents of the virtual disk
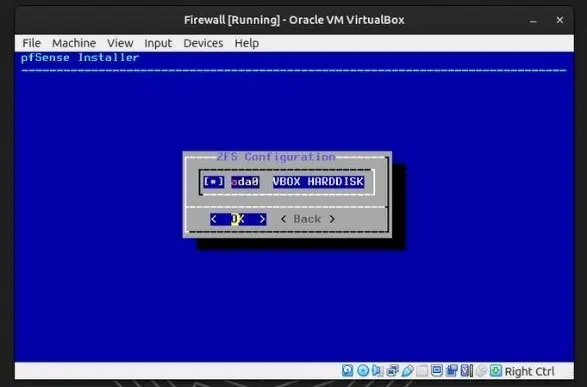
- Hit the spacebar to select the virtual disk.
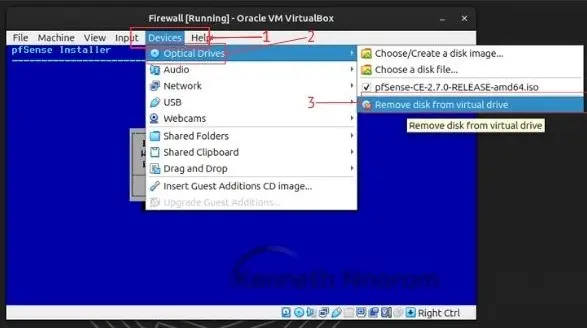
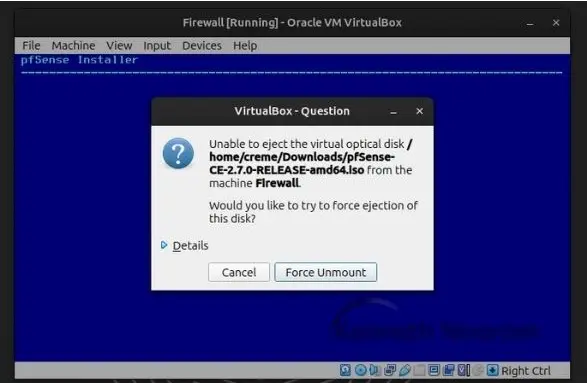
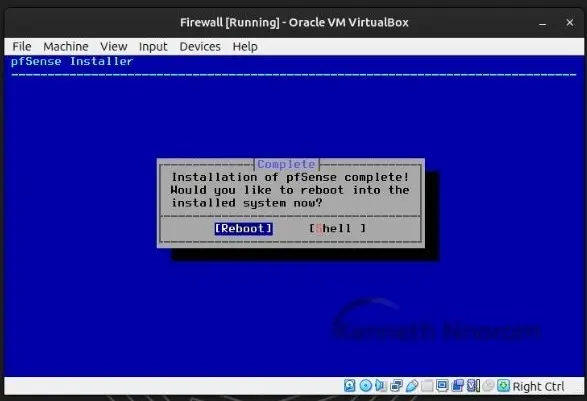
- In the next step, before you reboot the machine, we need to remove the installation disk; otherwise, the installation process might begin again on the next reboot. You can do this by clicking the menu bar and then the optical disk and unmount the pfSense ISO file.
Initial Set-Up
On next reboot, PFSense firewall would boot into an intial configuration shell with a list of options from where we can perform our initial setup. An the next thing we want to configure is our interfaces IP address for now.

Enter option “1)” to assign interfaces. You’ll be prompted to select the interface. For now, leave the WAN interface as DHCP. Remember, we configured interface one as NAT, so it should remain as it is to provide internet to our VM by NATting to any of the physical machine’s network interfaces.
Next, select “2” to configure the LAN interface. Type “N” to set a static IPv4 address. Since the host-only adapter, for which we disabled the DHCP server initially, has a root IP address of 192.168.56.1, we need to avoid IP address clash. Therefore, I chose the IP address 192.168.56.2 with a subnet mask of 255.255.255.0, expressed in slash notation as 24, as shown in the image below.

In the next step, you’ll be asked to enter an upstream gateway. Simply press the Enter key. When prompted to set up IPv6 DHCP, enter ‘n’ and then press the ENTER key.
You will then be asked to enable the DHCP server. Type ‘y’ and press ENTER. Enter the start IP address and then the end IP in the next prompt. You’ll encounter another prompt asking you to revert to HTTP as the webConfigurator protocol; press ‘y’ and then press ENTER as well. One more ENTER to continue, and we are done with this step.
Verify Firewall WebConfigurator For PFSense.
To test the PfSense WebConfigurator, you’ll need another Oracle Virtual Machine with a browser connected to the same Host-Only adapter as the LAN network for the PfSense.
In my case, I’m going to use the Kali Linux VM from my list of VMs. It already has one of its adapters connected to the same Host-Only Adapter as the Firewall’s LAN network. This allows the VM to obtain an IP address from the Firewall, connect to the internet via the Firewall, and most importantly, configure the firewall through its browser.
Start your chosen VM and confirm that it has obtained the correct IP address within the range of 192.168.1.100 and 192.168.1.200. Next, open your browser to manage the firewall by typing in the firewall’s IP address, which is 192.168.1.2. If you’ve followed the steps up to this point, the PfSense web interface should load
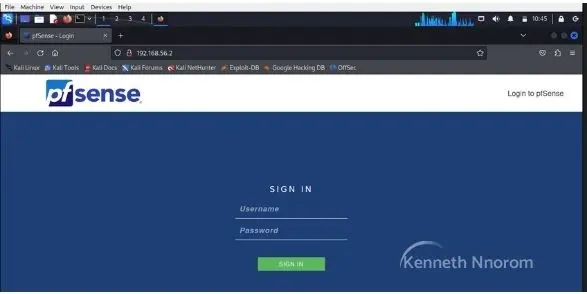
Enter the default pfsense username: admin and password: pfsense and you’ll be in.

With that, we have concluded this lesson. In the next lesson, we will delve into the basic configuration of the firewall.
Leave a Reply